Installation
VMware is pushing hard on the embedded version of its product, because the footprint is now much smaller it can be embedded into flash drives and ROMs. However for the time being there is still a good old fashioned installable version which is freely available for use. The following features are new to ESXi 4.1
Version 4 tries to improve on the last version and offers many advantages to previous releases
As I have mentioned you can have a running ESXi server from a flash drive, this is called the embedded version of the VMware hypervisor, eventually this O/S will be in a ROM on the motherboard. All that will be left to do is setup a password, the IP address and server name which can all be done via the Direct Console User Interface (DCUI).
To create a USB memory stick for ESXi follow the below, please change the below to the latest version as I might not have the latest version below
| USB stick | Make sure that the USB stick is supported by VMware, here are some of the supported one, but do check with VMware web site
For testing purposes I would try any USB stick and see if it works, however try and make sure it is USB 2.0 compatible and is at least 1GB and is a high-speed device. |
| Installation | You will need to download the installable version ISO file, for here we will need to obtain the .dd image file which will be used to image a USB stick. Below is how to install onto a USB using Linux
|
I am not going to go over how to configure the rest of the ESXi server as there are many documents on the web already and the DCUI is very easy to use, however I will point out some defaults that have been created
One thing regarding the network setup is that you can now test the network configuration within the DCUI which is very handy, a couple of screens in the DCUI are worth noting
The last thing to mention is the tech support command-line/Putty access although you can use Putty to access the ESXi server it is not supported and maybe removed in future releases, from the DCUI screen. To configure select "troubleshooting mode options" then select "Enable remote tech support (SSH)", you then can restart the management network. You now should be able to ssh to the ESXi server and login as root. However if you want to use a command-line tool you should use either vCLI or PowerShell, again I will be covering these tools in another section.
You can also access a command-line from the console as long "Local Tech Support" has been enabled, which is in the troubleshooting mode options screen.
| Console comand-line | Make sure "Local Tech Support" has been enable in the DCUI
|
You have two ways in which to access and configure your ESXi servers
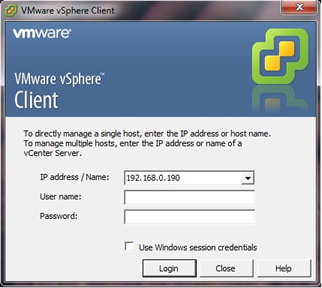
I am not going to go into great detail on how to install the vSphere client software as it is a standard windows application, once installed and running you will be presented with a login screen as below, from here you can access any of your ESXi servers, just enter the IP address or Server name (preferred) if using DNS and login details.
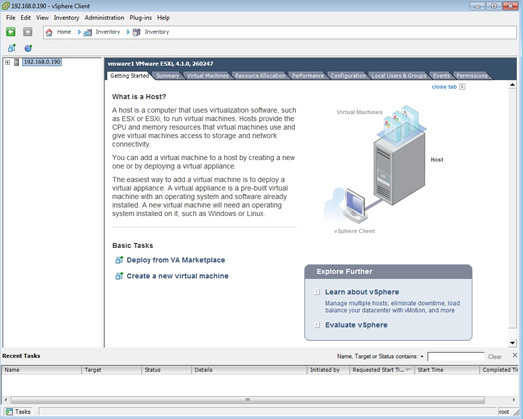
When you have enter the login details you will be taken the the main screen, compared to the vCenter screen it is vastly sparse (see below for a picture of the vCenter main screen)
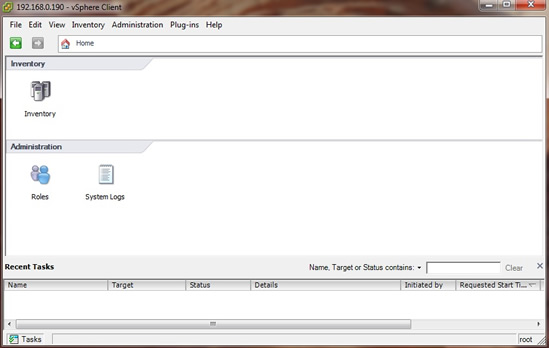
selecting the inventory icon will take you to the ESXi server main screen, here you have a number of tabs, I will be covering all the tabs in much greater detail in forth coming sections.
 |
|
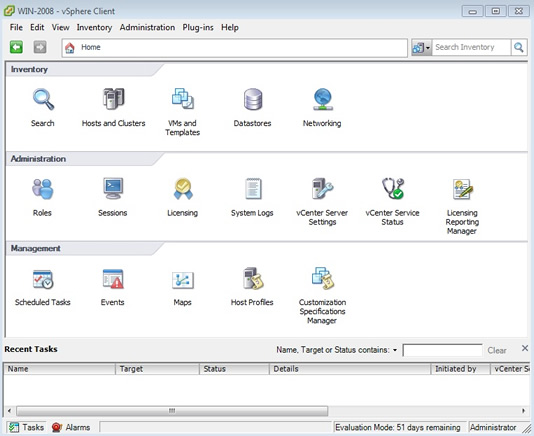
vCenter is a management application that allows you to manage many ESXi servers in a single window, the following features are only available when using vCenter
vCenter requires a database which can be any of the following
You can run vCenter either on a physical or a virtual machine, I prefer to run mine in a virtual machine so that I can take advantage of vMotion, HA, etc, it run's perfectly happy in a VM environment and both are supported by VMware. You can also join together multiple vCenter servers in a vCenter group to allow them to be managed using a single vSphere client connection, this is known as linked mode. Linked Mode uses Microsoft Active Directory Application Mode (ADAM) to store the vCenter linked mode configuration data. If you require further information on this subject I point you to the web, as I will not be going into detail on this subject.
For my test environment I create a VM using standard windows 2008 64-bit trail version, I used about 40GB of storage and set it up as a standard installation. Once the Windows 2008 server was up and running I downloaded the vCenter software and installed it (the questions asked are basic and if in doubt select the default option), the only thing to watch is that I got the vCenter installation to install a Microsoft SQL server express instance for me as my environment is only small. Use this link to see VMware installation guide and requirements also there are plenty of videos on youtube and documents on the web that explain this process in detail, so I am not going to re-event the wheel by explaining it here. Make sure the below services on the windows 2008 are running, sometimes they not running.

Once vCenter is up and running, using the vSphere client login into the vCenter, you should then get the main vCenter screen below, which has far more options available, here you can add ESXi servers to manage. vCenter is a licensed product but does allow you to manage many ESXi servers with easy plus it fully supports vMotion, HA, etc, but remember it does come with extra baggage managing a vCenter and Windows 2008 environment even if it is a virtual machine.
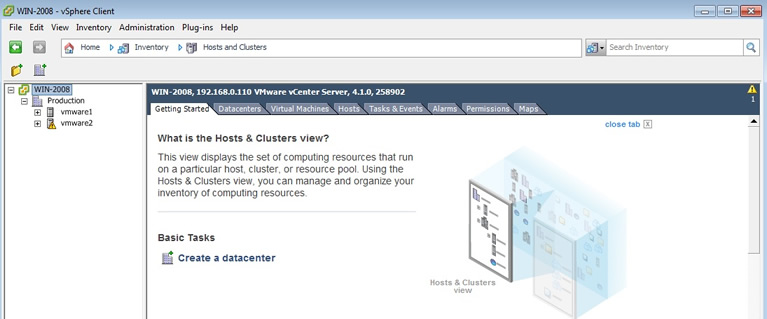
Here is another screen below showing that I have two ESXi servers being managed by this vCenter, we will go in to much detail on configuring ESXi servers and vMotion in other sections. vCenter has a hierarchical format, containers types that are available are datacenter and folder. You can group together ESXi servers that are related to one another (Production, QA/Test, DEV), here I have grouped my two ESXi servers into a datacenter called Production.
When you first add a ESXi server to vCenter it may take sometime, two critical changes are taking place, the vCenter Management Agent is installed onto the ESXi server and a user account called vpxuser is created (this is a service account). The Agent allows the vCenter to communicate with the ESXi server, this is done via a process called hostd, this process has four main tasks
One important note is try not to add any hosts using the IP address instead of the server name, this is because many of the VMware product do require name resolution and without reverse lookup on DNS, it can cause all sorts of problems.
It is possible to access the vCenter via a mobile device, VMware have developed the vCenter Mobile Access virtual appliance, it is a web server that communicates with the vCenter, the vCenter information is rendered into plain HTML and formatted to work with mobile devices, it's not fully supported and is deemed as a power toy for the time being.